
If you’re working with gas chromatography, OpenLab GC configuration is the very first step before you can run any analysis. In this guide, I’ll walk you through how to set up your GC in a simple and practical way so you can get up and running without unnecessary troubleshooting.
To make a long story short, before using a GC, each system must go through OpenLab GC configuration. This process allows the software to connect to the GC and collect hardware information such as serial number, installed modules (inlet, detector), settings, and firmware. Since these details are unique, every GC requires its own configuration.
Before You Start OpenLab GC Configuration
Before jumping into the configuration, make sure you complete these three checks:
- Close all online and offline ChemStation windows, if any
- Record the IP address of the GC you want to configure
- Ensure the GC is connected to the PC via LAN
For example, if the GC IP address is 10.1.1.10, your PC should be something like 10.1.1.20. The last number must be different from any other device on the network. Also, make sure both GC and PC share the same subnet mask.
To confirm connectivity, run:
ping 10.1.1.10
You should see a response with TTL=64, not a timeout. This step is critical before proceeding with OpenLab GC configuration.
Step-by-Step OpenLab GC Configuration
Now let’s go through the full configuration process.
1. Launch OpenLab Control Panel
Start by opening the OpenLab Control Panel.
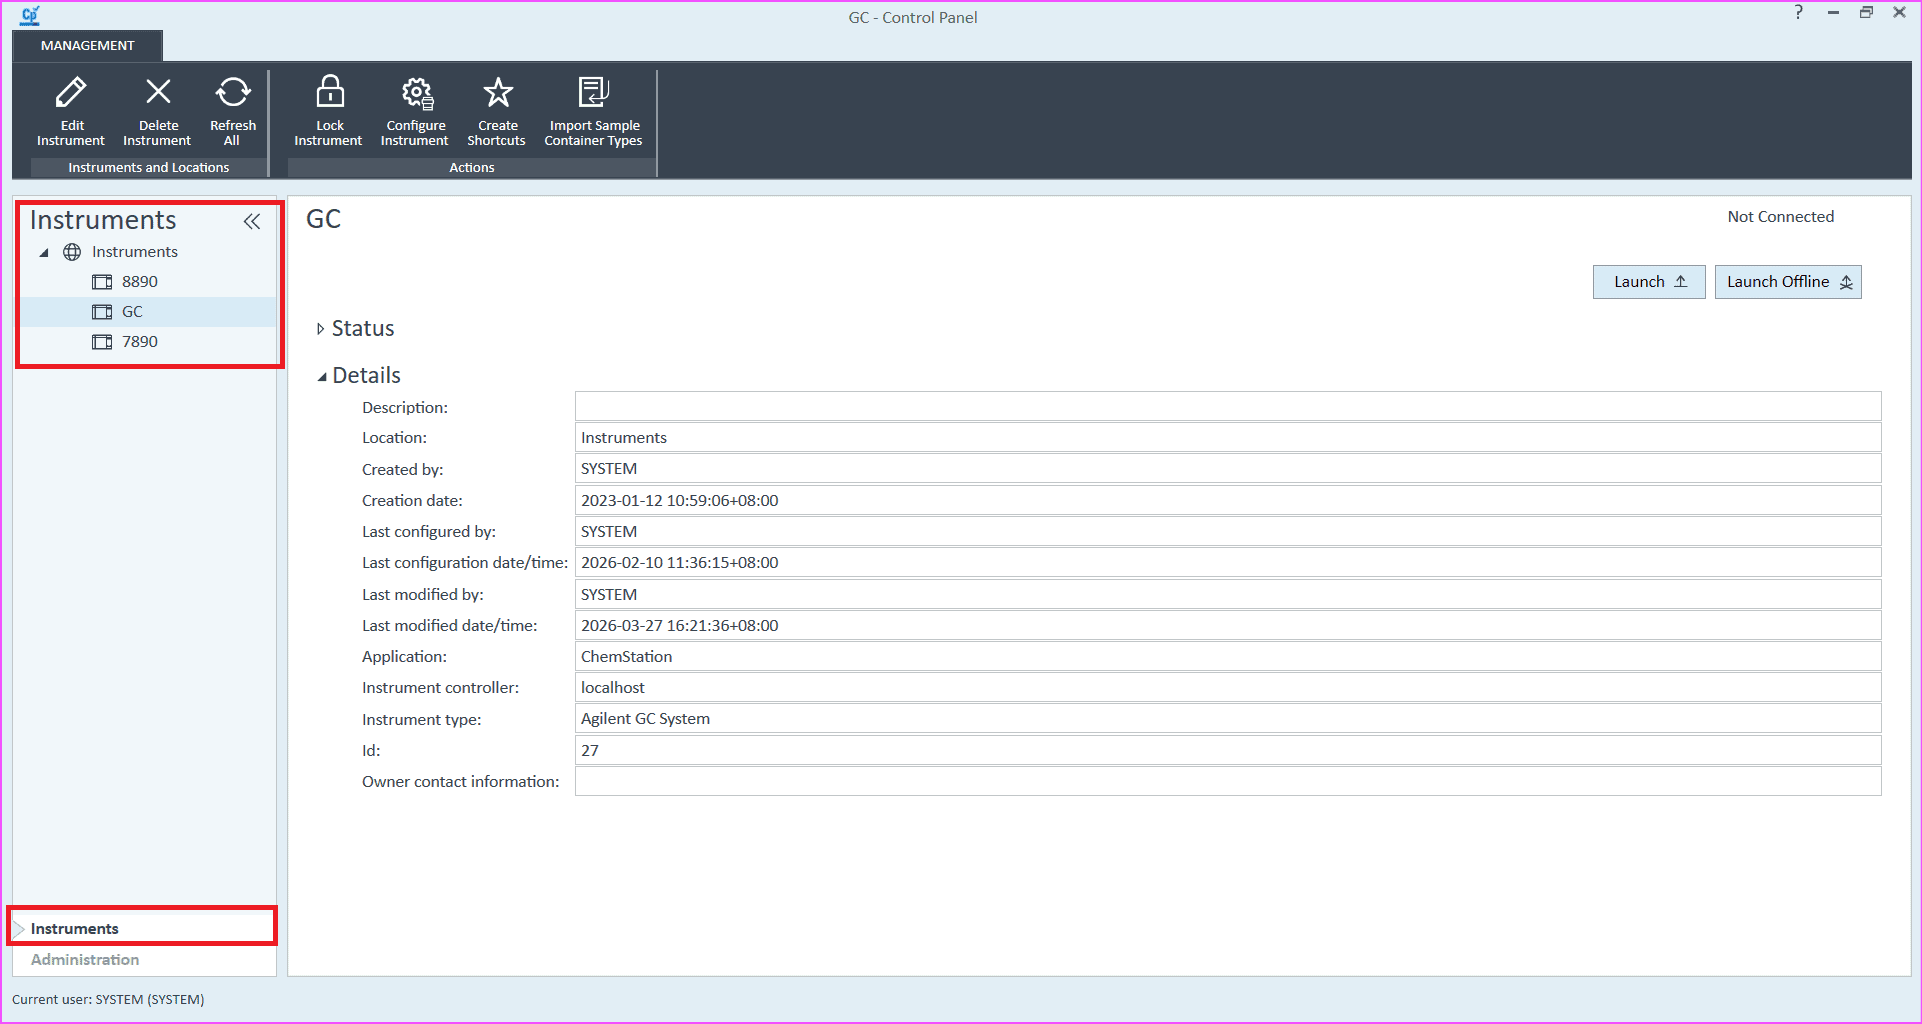
2. Navigate to Instruments
Select “Instruments” at the bottom left corner.
3. Check Existing Configurations
You will see a list of previously configured GCs. If none exist, the list will be empty.
4. Create a New Instrument
Click:
- “Instruments”
- “Create”
- “Create Instrument”
Different versions may look slightly different, so just find the closest option.
5. Assign Instrument Name
Give your GC a unique name. This name will appear in reports, so choose wisely.
6. Add Description (Optional)
You can include details such as:
- “GC for ASTM D2163 analysis”
7. Select Instrument Type
Choose:
- Agilent GC system
Then click OK.
8. Locate Instrument in Tree
The instrument name will now appear on the left panel.
9. Click Configure Instrument
Select the instrument, then click “Configure Instrument”.
⚠️ If this button is greyed out, you likely didn’t close all ChemStation windows earlier.
10. Select Hardware Modules
Choose the correct GC model and any connected modules:
- GC only → select GC
- GC + Headspace → select both
Move them to the right panel.
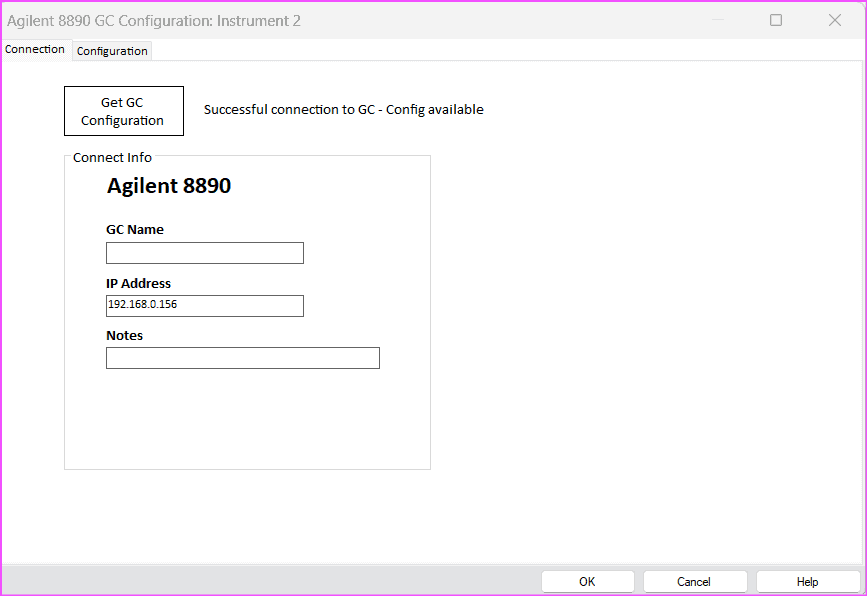
11. Enter IP Address
A new window will appear. Enter the GC IP address you recorded earlier.
12. Get Configuration
Click “Get Configuration”.
After ~30 seconds, you should see “successful connection”.
If not:
- Check IP address again
- Perform ping test
- Disable firewall if needed
Firewall issues are a very common cause of failed OpenLab GC configuration.
13. Confirm Connection
Click OK once the connection is successful.
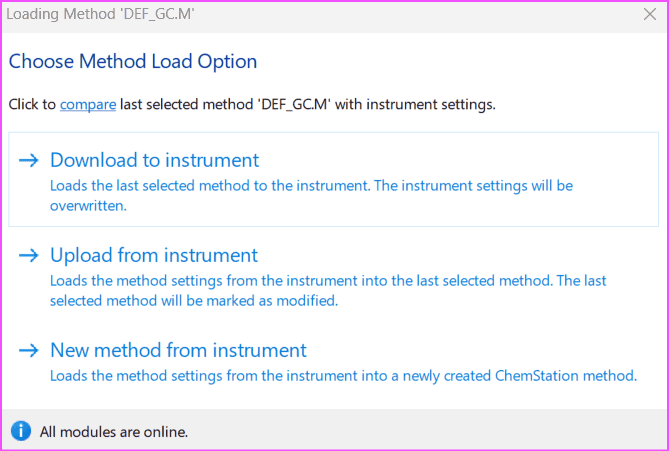
Method Load Options in OpenLab GC Configuration
During OpenLab GC configuration, you’ll need to select how methods behave at startup.
Option A: Always Ask
Prompts user every time.
Option B: Download Method to Instrument
Loads last method and updates GC conditions.
Option C: Upload Method from Instrument
Loads method but keeps GC conditions unchanged.
Option D: New Method from Instrument
Creates a default method (def_gc.M) using current GC parameters.
👉 This is my preferred option. Just make sure def_gc.M is always available.
Final Steps in OpenLab GC Configuration
Enable Intelligent Reporting
- Tick if using RDL templates
- Untick if using FRP templates
If unsure, it’s safer to enable it for future use.
Create Shortcut and Launch
- Click “Create Shortcuts”
- Launch the online version from desktop
You’ve now completed the OpenLab GC configuration and can start controlling your GC.
Key Takeaways
- OpenLab GC configuration is required for every GC system
- Always verify IP connectivity before starting
- Firewall issues are a common problem
- Choosing the right method load option can save time later
- Proper setup ensures smooth operation and reporting
Ready to Get Started?
If you’re setting up a new system, take a few extra minutes to do your OpenLab GC configuration properly — it will save you hours of troubleshooting later.
If you’ve faced connection issues before, feel free to share your experience. It might help others avoid the same problem.
Check out other posts in OpenLab ChemStation GC Guides below: